Your first audit.
Your first verified fix.
HyperSEO 0.3.2 runs on your computer for one local operator. Start with the included test website, then connect the websites and reports you manage.
1. Download and install
Open your download library with the email used for your purchase or All Access membership. Download the source ZIP and its SHA-256 checksum. On macOS/Linux, run shasum -a 256 hyperseo-0.3.2.zip; on Windows use Get-FileHash hyperseo-0.3.2.zip -Algorithm SHA256. Compare the full hash with the checksum file.
Extract into a new, writable folder. Install Node.js 22.13 or newer with npm. Open a terminal in the extracted folder and run:
npm run setup
npm start
Setup installs the locked dependencies, runs checks and builds the app. It creates .env.local only when missing. Keep the terminal open, then visit http://127.0.0.1:3226.
2. Practice on the test website
Choose Fieldwork Studio, labeled Local test. Open Opportunities, select a title or description finding and choose Review fix. Compare the original and draft, edit the wording, and choose Apply. Open the local page to see the HTML change. Use Restore in the change history to return the original value.
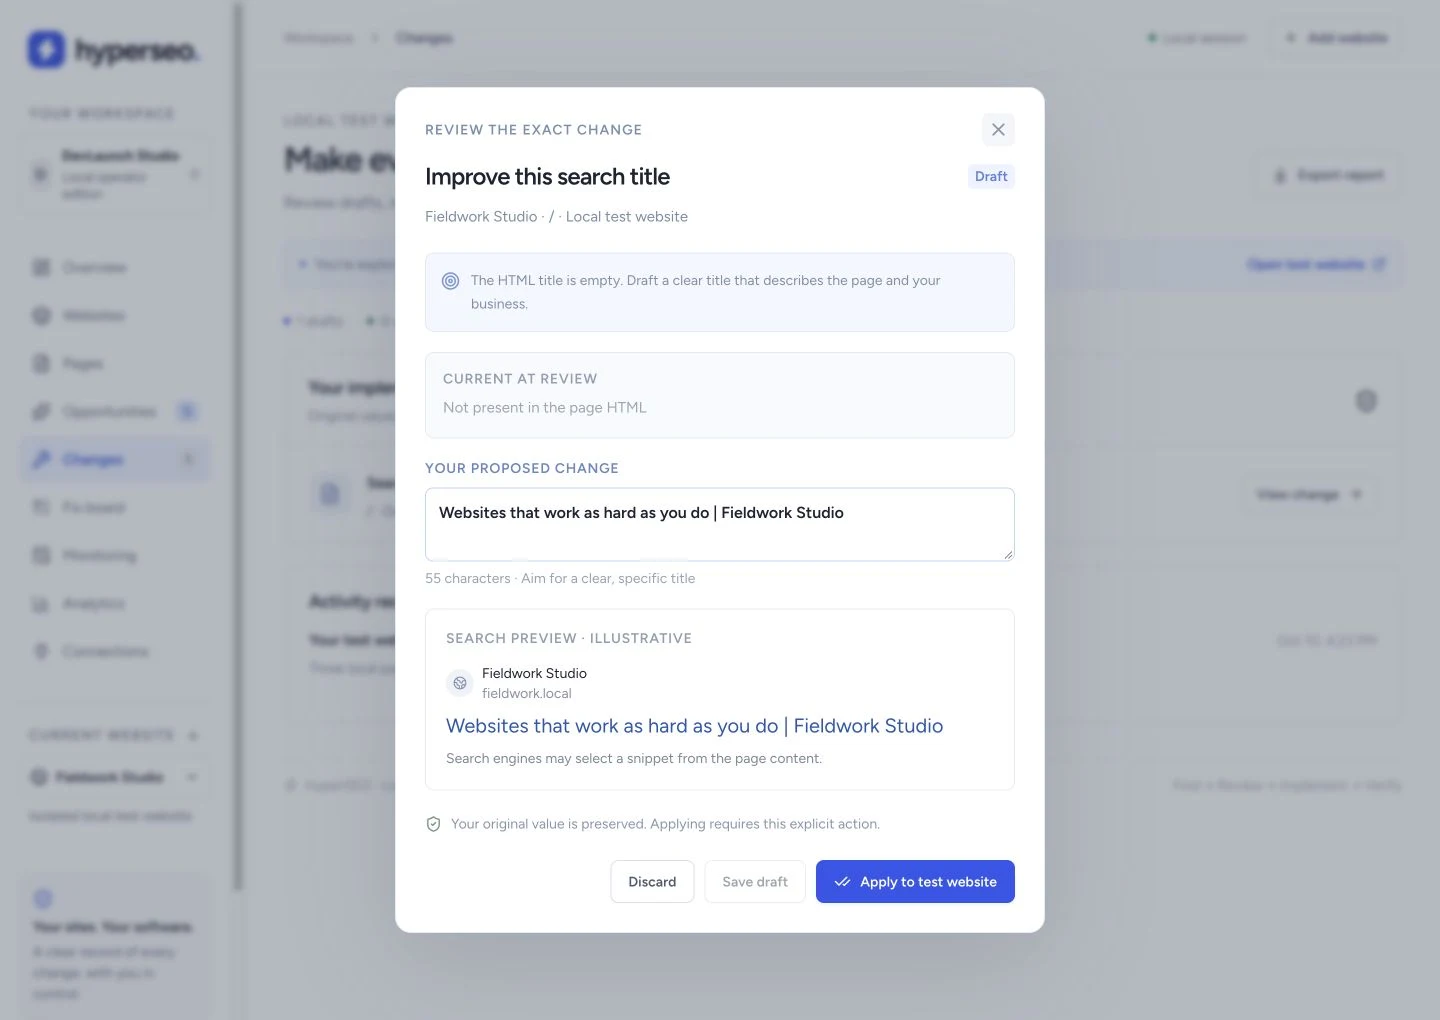
This practice site is isolated. It does not generate traffic data or change an external website.
3. Add your website and evidence
Use Add website for a public website you’re authorized to inspect. Run audit and review the crawl notes, sample and page findings. The crawler checks same-site public HTML and respects robots rules.
In Connections, configure your own Google OAuth application, using the redirect URL shown in HyperSEO. Authorize the account that can access your Search Console and GA4 properties, select the matching properties, and sync. Alternatively, import supported CSV reports in Analytics. Follow the source/date/coverage labels when interpreting them.
4. Connect WordPress for supported fixes
The source ZIP includes extras/hyperseo-connector.zip. Install it through your own WordPress Plugins → Add New → Upload Plugin screen, then activate it. Follow Connections in HyperSEO to configure your WordPress URL, administrator username and a dedicated application password.
Review and test compatibility on your own staging site first. The connector supports titles and descriptions on compatible pages. Inspect the proposed value, choose Apply, verify the actual HTML, and use guarded Restore when needed. Other findings stay on your fix board for manual implementation.
5. Keep the worker available
npm start runs both the web app and the read-only worker. Run diagnostics in another terminal:
npm run doctor -- --running
Monitoring starts off. Enable daily or weekly checks in Monitoring if you want recurrence; keep your computer and the app available. Credentials stay encrypted in private local storage. Back up the stopped database and its matching credential key together.
Installing with a coding agent?
The archive includes AGENTS.md, CLAUDE.md, GEMINI.md, AGENT_SETUP.md, setup and troubleshooting guides. Open the extracted folder in your coding tool and use this prompt:
Read START_HERE.md, AGENTS.md and AGENT_SETUP.md. Install this version of HyperSEO using SETUP.md. Preserve the lockfile, existing configuration, private data and its matching key. Run setup, start both local processes and check doctor. Verify the workflow on the local test website. Report local checks separately from live Google and WordPress checks. Keep credentials out of chat.
Agent setup · Full installation guide · Agent project rules · Troubleshooting
Extending your installation
Customize the source with your preferred coding tools. The delivered edition is local and single-operator. Before public hosting, add and validate user authentication, tenant authorization, hosted persistence and credential management. For upgrades, preserve your customizations and private data; compare versions in a new folder.